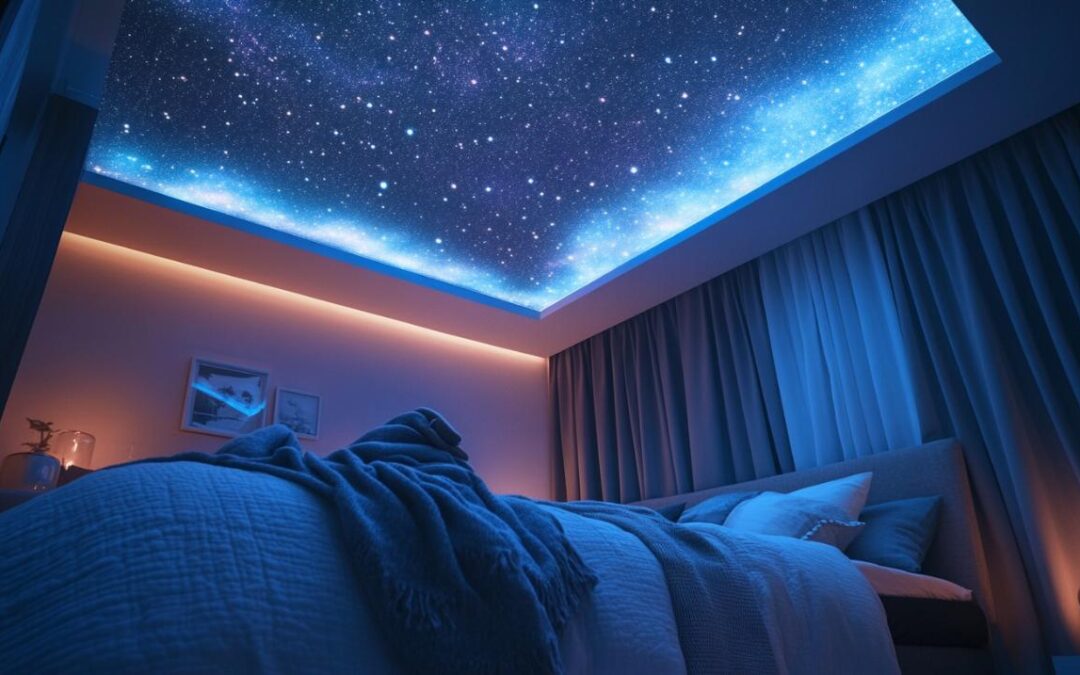
Transforming your bedroom ceiling into a breathtaking starry night sky is not merely a decorative flourish but an invitation to drift off to sleep under a canopy of twinkling celestial wonders. This DIY project, while requiring some time and patience, is remarkably achievable for anyone willing to dedicate a weekend to crafting a personal constellation above their bed. Whether you envision a subtle sprinkling of stars or a dense galactic display, the process involves careful planning, precise execution, and a touch of creativity to bring the cosmos indoors.
Planning your starry ceiling project
Before you start drilling holes or unwrapping reels of fibre optic cable, a solid plan is essential to ensure your starry ceiling looks stunning and functions reliably. This initial phase involves making critical decisions about materials, understanding the scope of your project, and preparing your workspace. A well-thought-out approach will save you time and frustration later, particularly when you are working overhead and balancing on a ladder. This planning stage is also where you can let your imagination run wild, deciding whether you want a realistic representation of actual constellations or a more abstract, dreamy scatter of light points across your ceiling. Resources such as maderascovelo.es might offer insights into broader home improvement trends that can inspire your design choices, even if their primary focus is on property and interior decoration trends in general.
Choosing the Right Materials and Method
Selecting the appropriate materials is the cornerstone of a successful starry ceiling installation. The most popular and effective method involves using a DIY fibre optic star ceiling kit, which typically includes a light engine equipped with a power supply and remote control, along with a bundle of fibre optic cables. These kits are designed to create a realistic twinkling effect, as the light travels through the thin fibres and emerges at the ceiling surface. Fibre optic systems are favoured because they offer a safe, low-voltage solution that can be installed without extensive electrical knowledge, though consulting a qualified electrician is always advisable for the final connections. An alternative approach involves LED strip lights or individual LED stars, which can be easier to install but may lack the subtle, natural shimmer of fibre optics. When choosing your kit, consider the density of stars you desire, with recommendations often suggesting between fifty and one hundred fibres per square metre for a balanced, visually appealing effect. The light engine itself should come with a remote to adjust brightness and colour, allowing you to tailor the ambiance to your mood. Ensure the kit is suitable for the operating temperature of your bedroom, which typically ranges from zero to forty degrees Celsius. If you plan to install the system in a bathroom or sauna, remember to keep the light engine away from moisture and high temperatures to avoid damage. Other essential items include an MDF board to serve as the base for your star field, paint or fabric to cover the visible side of the board, adhesive spray, silicone or epoxy glue, black cloth tape, felt dots, and electrical tape. You will also need basic tools such as a cordless drill, glue, side cutters, scissors, marker pens, and wire cutters. Optional drill bits designed for fibre optic installation can make the process smoother and more precise.
Measuring and mapping your bedroom ceiling
Once you have gathered your materials, the next step is to measure your ceiling and map out where your stars will be positioned. Begin by measuring the area of the ceiling where you intend to install the starry effect, noting any light fittings, beams, or architectural features that might affect your design. Cut your MDF board to fit the designated space, ensuring it is slightly smaller than the ceiling area to allow for easy installation and adjustments. Before you start drilling, prepare the visible side of the board by painting it a dark colour or covering it with black fabric using adhesive spray. This dark background will enhance the contrast and make the stars appear more vivid when illuminated. Once the board is prepared, take time to mark the positions of your stars using marker pens. You can follow actual star maps to recreate recognisable constellations such as Orion, the Plough, or Cassiopeia, or simply distribute the marks randomly for a more abstract look. Aim for a density that feels natural, avoiding overly uniform spacing that can appear artificial. A useful guideline is to plan for fifty to one hundred fibres per square metre, adjusting based on your personal preference for a sparse or densely populated night sky. Consider marking a starting point on the board that will correspond to the location of your light engine, as this will help you organise the fibre optic bundle later. Take photographs or make sketches of your marked board so you can refer back to them during the drilling and fibre insertion stages. This preparatory work is crucial because once you start drilling, it is difficult to make changes without compromising the integrity of the board. Accurate measuring and thoughtful mapping will ensure that your finished ceiling is both beautiful and structurally sound.
Installing your diy starry night sky ceiling
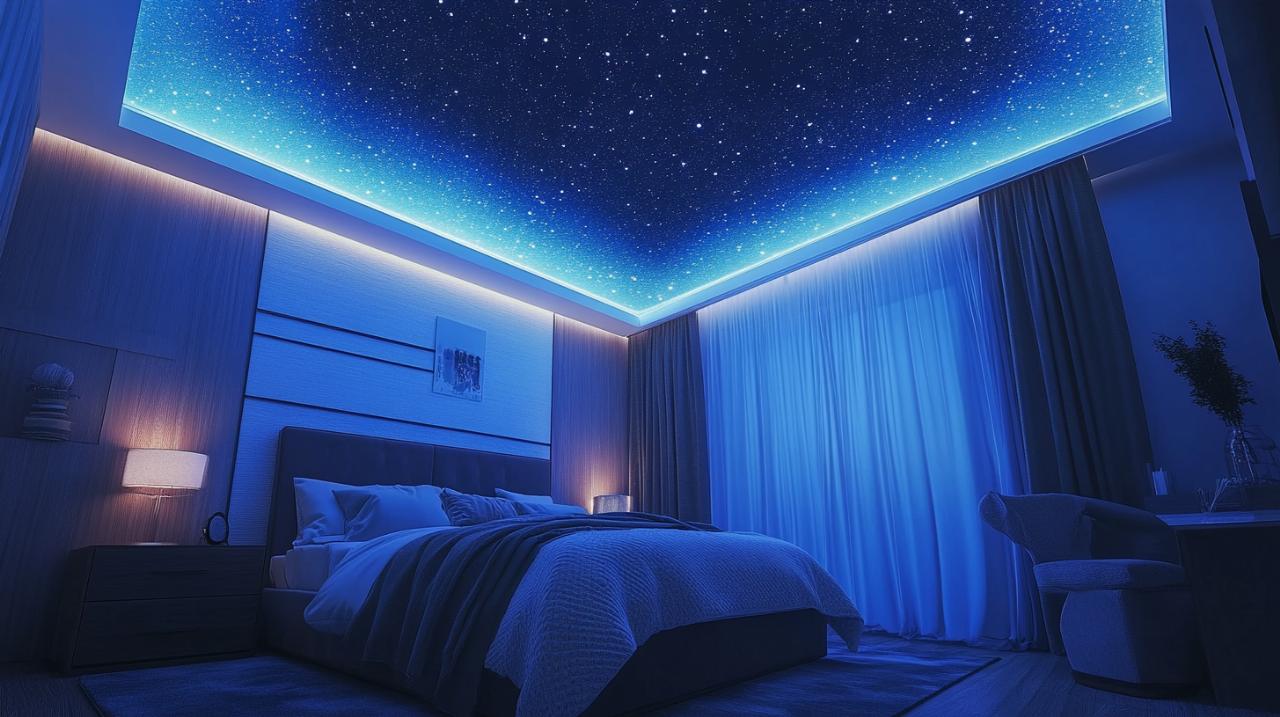
With your planning complete and materials at hand, you are ready to embark on the installation itself. This phase involves drilling, threading fibres, securing connections, and mounting the finished panel to your ceiling. While the process can be time-consuming, taking approximately eight to nine hours for a three-square-metre panel with two hundred fibres, the result is a magical transformation of your bedroom into a serene, celestial retreat. Working methodically and safely will ensure that the installation is smooth and the final effect is both stunning and durable.
Setting up fibre optic cables or led lights
Begin the installation by drilling holes at each of the marked star positions on your MDF board. Use a cordless drill with a bit that matches the diameter of your fibre optic cables, ensuring the holes are clean and precise. Drilling from the visible side of the board will give you better control and accuracy. Once all the holes are drilled, identify the starting point on the back of the board where you will begin inserting the fibre optic tails from the bundle. Thread each fibre through a drilled hole, pulling it gently from the back until a small length protrudes from the front. This protruding section will eventually be trimmed to the desired length to create the twinkling effect. As you work through the bundle, keep the fibres organised and avoid tangling, which can complicate later adjustments. After all the fibres are inserted, secure them on the back of the board using silicone or epoxy glue, ensuring they are firmly attached and will not slip back through the holes. Cover the back of the board with black cloth tape to tidy up the appearance and provide additional support for the fibres. Once the glue has fully set, use side cutters or scissors to trim the fibres on the visible side of the board to the length you prefer. Shorter fibres will produce a subtle glow, while longer fibres can create a more pronounced starry effect. If you are using LED lights instead of fibre optics, the process is simpler but less flexible. Attach the LED strips or individual LED stars directly to the ceiling or board using adhesive backing, following the pattern you mapped out earlier. Connect the LEDs to a power source, ensuring all electrical connections are secure and comply with safety standards. For a fibre optic system, the next step is to connect the fibre bundle to the light engine. Most kits will have a straightforward connection point, but always refer to the manufacturer's instructions to avoid damaging the equipment. Position the light engine in a location where it can be accessed for maintenance, but away from moisture and extreme temperatures. If you are unsure about the electrical connections, it is strongly recommended to hire a qualified electrician to complete this part of the installation. A typical setup requires a two-hundred-and-thirty-volt lighting circuit with a six-amp miniature circuit breaker to ensure safe operation.
Creating constellations and finishing touches
With the fibres or lights in place and the connections secure, you can now mount the prepared panel to your bedroom ceiling. Position the board carefully, aligning it with the area you measured earlier, and secure it using appropriate fixings such as screws or brackets. Ensure the panel is level and firmly attached to prevent any risk of it coming loose over time. Cover the screw heads with felt dots or decorative caps to maintain a clean, polished look on the visible side of the ceiling. Once the panel is mounted, turn on the light engine and step back to admire your handiwork. Adjust the brightness and colour settings using the remote control to find the perfect ambiance for your bedroom. If you have followed a star map, take a moment to identify the constellations you have recreated and appreciate the accuracy of your work. If you opted for a random pattern, enjoy the abstract beauty and the sense of calm it brings to the room. To enhance the effect further, consider adding extra finishing touches such as glow-in-the-dark paint for planets or nebulae, which can complement the fibre optic stars and add depth to your starry night sky. You might also experiment with different colours of light, using the remote to switch between warm whites, cool blues, or even subtle purples to simulate the varied hues of the cosmos. If you have prepared two independent panels with a single kit, you can create a layered effect by installing them at different levels or in adjacent sections of the ceiling, adding complexity and visual interest. Remember that the light engine may require occasional maintenance, so ensure it remains accessible without disrupting the overall aesthetic. If you plan to install the system in a bathroom or sauna, take extra precautions to protect the light engine from moisture by placing it in a sealed, ventilated housing or outside the high-humidity zone. Testing the system thoroughly before finalising the installation will help you identify any issues early and ensure that your starry ceiling functions flawlessly for years to come. The entire process, from initial planning to final adjustments, is a rewarding DIY endeavour that transforms your bedroom into a personal sanctuary under the stars, offering a daily reminder of the beauty and wonder of the night sky.